This tutorial assumes you have a basic knowledge in web development and knows basic programming. I recommend that you first read my previous post titled “Hello world app with the vibe.d web framework” if you are new to vibe.d web framework.
In my previous post on using vibe.d web framework, I showed how vibe.d can make web development easy. In this tutorial, I will show how you can use vibe.d to create a form to submit data and files.
Create a new vibe.d project. I will call mine vibe-upload;
aberba@mx:~/workspace/d/$ dub init vibe-upload --type=vibe.d
Package recipe format (sdl/json) [json]:
Name [vibe-upload]:
Description [A simple vibe.d server application.]:
Author name [Lawrence Aberba]:
License [proprietary]:
Copyright string [Copyright © 2016, Lawrence Aberba]:
Add dependency (leave empty to skip) []:
Successfully created an empty project in '/home/aberba/workspace/d/'.
Package sucessfully created in vibe-upload
The contents of the project folder is as follows;
aberba@mx:~/workspace/d/vibe-upload$ ls
dub.json  public  source  views
Implementing form for text data
For starters, lets see how sending textual form data (text) works using HTTP POST. Create an index.dt file in views folder and insert the following diet template code;
doctype html
head
    title File upload
body
    form(method='post', action='/upload', enctype='multipart/form-data')
        p
            label(for='title') Title
            br
            input(name='title',type='text')
        p

        button(type='submit') Send
The contents of the source/app.d file will now be as follows;
import vibe.d;

static this()
{
    auto router = new URLRouter;
    router.get("*", staticTemplate!"index.dt");

    auto settings = new HTTPServerSettings;
    settings.port = 8080;
    settings.bindAddresses = ["::1", "127.0.0.1"];
    listenHTTP(settings, router);

    logInfo("Server Running");
}
Unlike the previous vibe.d post, the router.get() HTTP route here uses the staticTemplate function to render index.dt as a static template for all GET requests (You can configure it however you want).
Now its time to write a function to handle form submission using a POST request. Let’s write an upload function above the main function and register it in router to handle form submission through /upload URL as specified in the form property (action='/upload').
void upload(HTTPServerRequest req, HTTPServerResponse res)
{
    import std.stdio;
    string title = req.form.get("title");

    writeln("Form title is: ", title);

    res.redirect("/");
}
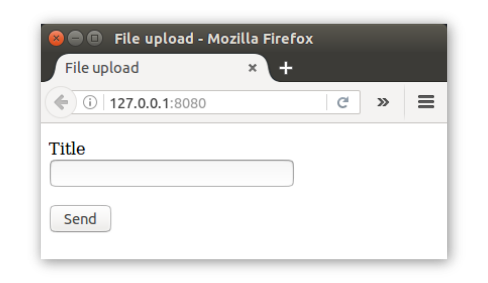
The above upload function will extract the title input data from the req.form property using its get method (use req.query.get() method for an HTTP GET request). For now, we just write the title to the console and redirect to the browser back to the homepage. Run the server and fill-in the text input of the form which should look like the screenshot below;

Implementing file upload
Now we are ready to add file upload functionality. Open the index.dt file and add a file input.
doctype html
head
    title File upload
body
    form(method='post', action='/upload', enctype='multipart/form-data')
        p
            label(for='title') Title
            br
            input(name='title',type='text')
        p

        p
            label(for='document') Select your document file
            br
            input(name='document', type='file')
        p

        br
        button(type='submit') Send
Create a new folder named uploads in your public folder where we will store all uploaded files. Now lets update the upload function to support file upload;
void upload(HTTPServerRequest req, HTTPServerResponse res)
{
    import std.stdio;
    string title = req.form.get("title");

    // File upload here
    auto file = "document" in req.files;
    try {
        moveFile(file.tempPath, Path("./public/uploads") ~ file.filename);
        writeln("Uploaded successfully!");
    } catch (Exception e) {
        writeln("Exception thrown, trying copy");
        copyFile(file.tempPath, Path("./public/uploads") ~ file.filename);
    }

    writeln("Form title is: ", title);

    res.redirect("/");
}
In the above code, we use a try/catch block to handle exceptions in cases where moving file from the temporal folder to public/uploads fail (file permission restriction, etc).
NOTE: The maximum default size for file upload is 2MB (2097152 bytes). You can change that in
settings.maxRequestSize = XLU;whereXis the number of bytes (1MB is 1048576 bytes). See the documentation of maxRequestSize for more options.
Now it’s time to register the upload function to the /upload POST route in router. Add the following code below router.get("*", staticTemplate!"index.dt"); to do that;
router.post("/upload", &upload);
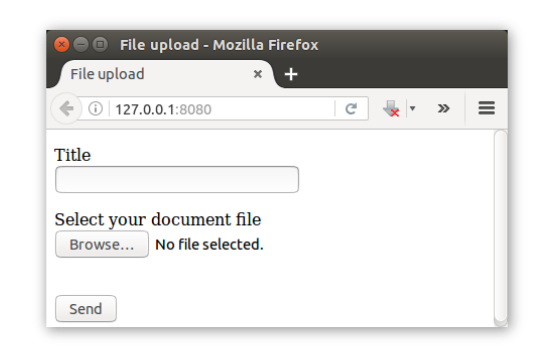
Now we are all set test our app. Build the project again and the form should now look like the screenshot below;

Fill-in the title input, select a sample file and submit form. If everything is successful, you should see the title input value printed in your command-line and the file should be uploaded to the public/uploads folder.
I hope you find this tutorial useful. In future tutorial, I will show how you can upload multiple files.
